![[Your Site Name]](/storage/WideOpen%203%20tst2.jpg "[Your Site Name]")

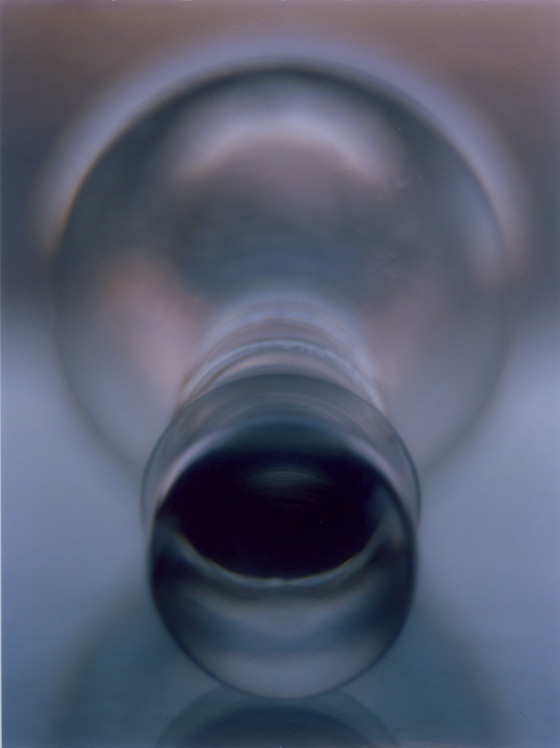
Front Lens Group - Taylor Hobson 5" F1.5 Projection lens - 'Old Style Jar # 6'
Something much more than a painting, but less than a photograph. This jar is laying on its side toward the lens, laying on thick glass and is backlit against bright light coming through a window directly behind the jar.
Exposure was F2.8 @ 1/30 sec, and the illumination off the glass and wherever else except through the jar was expected to diffuse to a white and soft texture/tone.
The selected focus was the result of an interesting problem, since a consideration of focus was not only of the glass knob in front, but also of what you could see inside it. Racking focus back and forth and then thinking about it gives this image.
The flare off the back of the jar is interesting and is different, how??? I'll have to think about it.
 Jonathan Brewer
 2 Comments
The Front Lens Group of the Taylor-Hobson 5 inch F1.5 Projection Lens
This image is the first representative image of what will be my third project, using the front lens group of one of the rarest lenses I know of, the Taylor-Hobson 5 inch projection lens.
I’ve come across some very vague anecdotal statements that this lens was somehow connected w/early TV experiments, and wondered how that ‘jibes’ w/ the fact that it’s a projection lens. I don’t know anything about the lens formula, but w/its F1.5 capability, I knew as soon as I saw this lens on ebay that I would 'bite'.
‘Biting’ on this lens wasn’t difficult because despite not knowing anything about this lens and or even what I could do w/it, I only had to shell out $25.00 plus shipping for this thing, and it was mine. I unscrewed this thing and was amazed at how much glass was in it, it, almost all glass from front to back, and really put together, and I was struck at how it must’ve cost a fortune to create this thing, and how it ended up in my hands for $25.00.
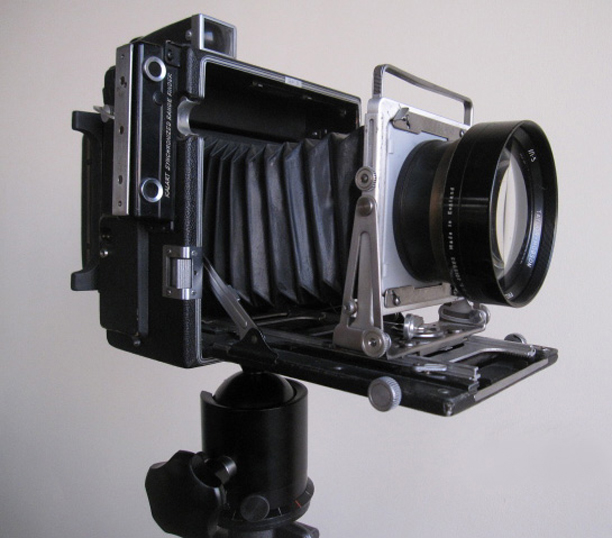
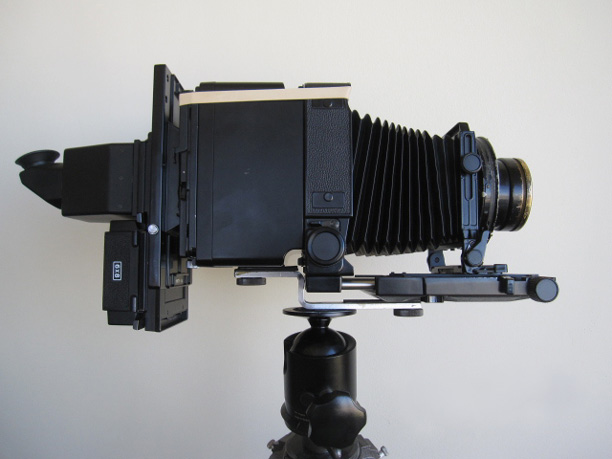
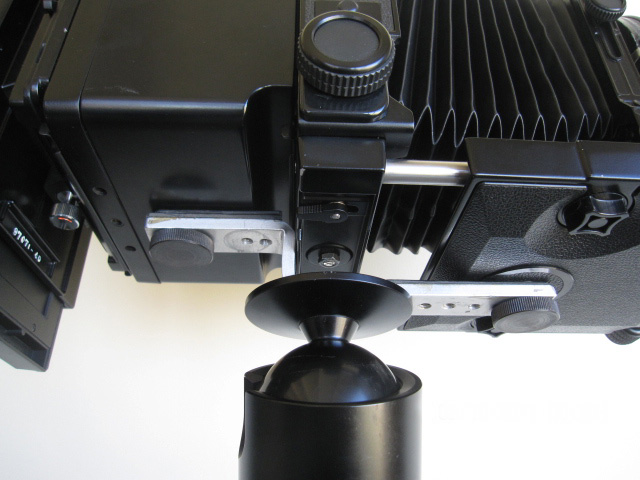
The front lens group comes out of the barrel and you can then unsrew the front and back elements. There’s a threaded cover plate protecting the back of the front lens group, which I had mated to a pacemaker lensboard and I only had to screw the front lens group into this and I was ‘good to go’ to start using this on my Pacemaker.
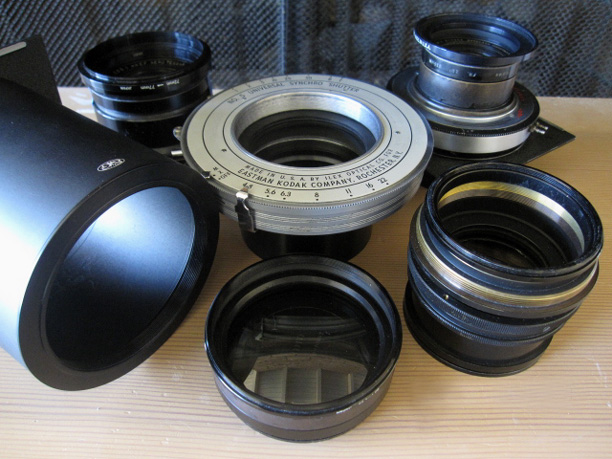
I’m ‘guestimating’ that in this config. the FLG has a FL of 250-300 mm and F2.8 wideopen. There's a couple of shots of the Taylor-Hobson FLG on the Pacemaker, it's big, but a bit smaller than the AE.
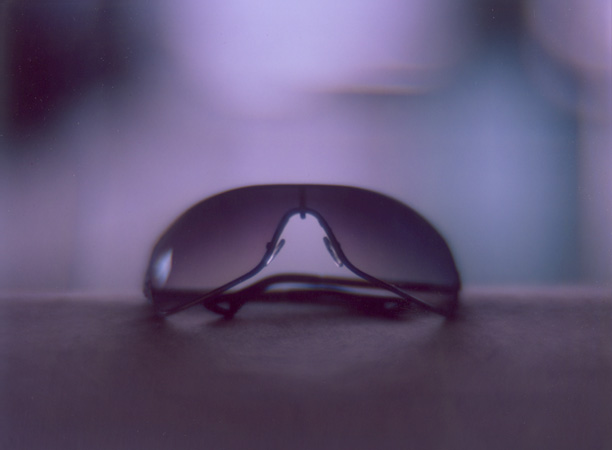
Looking through the ground glass, the plane of focus w/this is as shallow as the AeroEktar but w/a greater degree of distortion behind the sharpest plane of focus via anything out of focus behind the foreground subject matter.
The statement I always make about these lenses is the same statement this lens makes, in how it renders the foreground in a fairly representational way, and at the same time transitioning/turning the background into abstraction. Calling these lenses Soft Focus lenses, and I'm guilty of doing it as much as anybody, just doens't fully describe what they ultimately do, which is gives you two different styles in one image.
This image was shot w/Fuji 100C45 and the combination produced some muted textures as opposed to a lot of contrast. This was all backlit.
I love Fuji 100C, and I have to laugh at myself because I always start out exposing my first attempts w/the intent to get the shot right w/the Fuji and then shooting the final exposures w/sheetfilm, and I invariably end up just stopping after I shoot w/the Fuji 100C. Many of the images I've shot w/100C have a 'feel' of being much more than a painting, but something less that an image exposed on film and for me gives many of my images a 'alternative process' cache. 'Wishful thinking'??? Maybe, but I love the look.
You tell me.
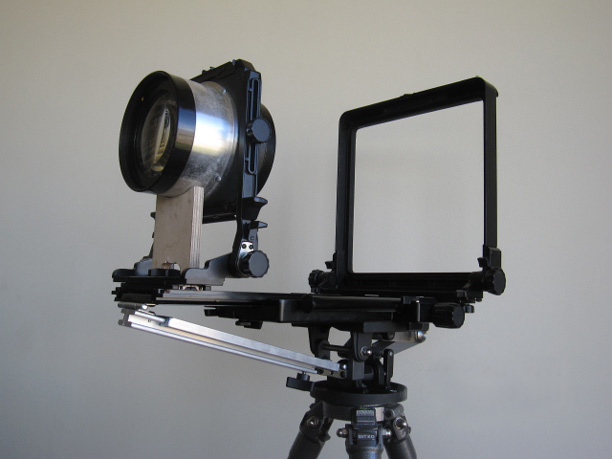
Using my Classic/SF lenses w/my Toyo 45 - 4" ext. Sleeve-Sliding Rollfilm Adaptor
This is the second of what will be 3 of my ongoing projects.
I’ll be using the 610 AE close to home, but I also plan on getting out and exploring w/my classic lenses, w/the Velostigmat II, 9.5” Raptor, the Gundlach Achromatic Meniscus, the 305mm Kodak Portrait, the 253.5 AeroTessar, the 300mm Turner-Reich, and my own creation the Variable Positive Meniscus. I plan to shoot a lot of infrared w/each lens.
Also shown w/my lenses is the 4.5” combination extension sleeve-lensboard which was machined by Steve Grimes which gives me some extra extension without piling some more junk on the back of the camera.
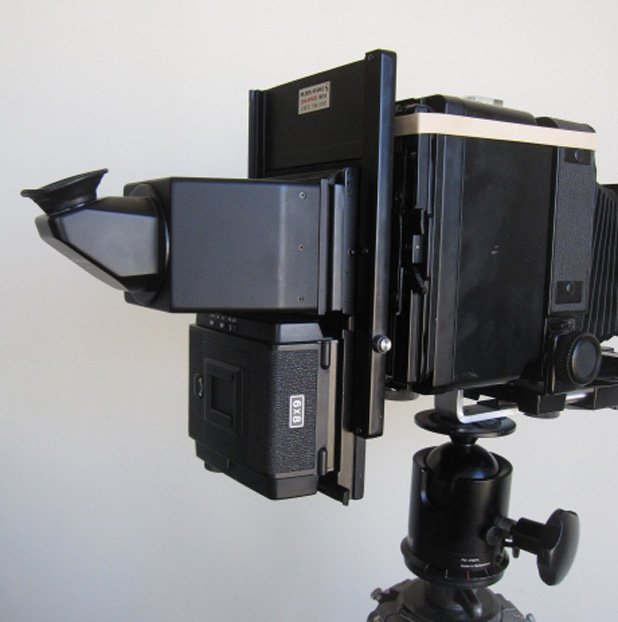
I’ll be using these lenses w/my Toyo 4x5 w/its 4” extension sleeve and my sliding rollfilm adaptor which gives me rollfilm capability w/the Toyo since I’ll be experimenting w/multiple lenses. I’ve made modifications to both the sliding rollfilm adaptor, and the bottom of the Toyo via an adaptor to shift the camera's balance backward to compensate for the tendency of this rig to be ‘backheavy’ w/the 4” extension sleeve and rollfilm adaptor aboard.
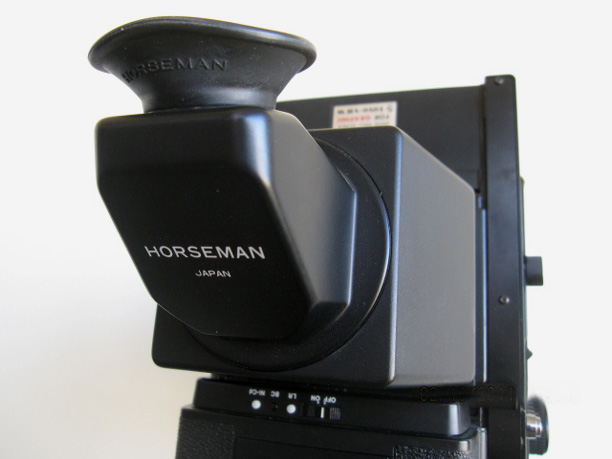
I modified the sliding rollfilm adaptor by taking a ‘snap in’ connector off a Toyo 6x9 viewing hood and mating it to the front of a Horseman 6x9 angle reflex viewer which then can be connected to the Toyo rollfilm adaptor giving me ‘right side up’ reflex viewing instead of the upside down image of the Toyo viewer.
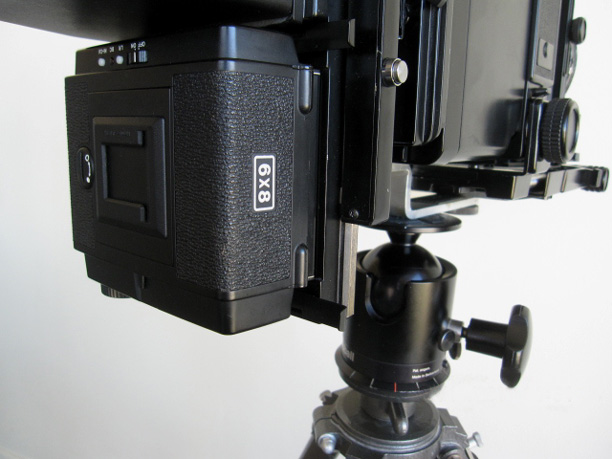
I’m using a Mamiya 6x8 motorized mag rollfilm back because advancing to the next frame w/a manually winding back ‘jars’ the camera and you’re not correctly framed for the next shot if you want to bracket.
These modifications give me essentially a bigger but much slower Mamiya RB while enabling me to use my Large Format lenses. I’ll be able to play w/all of my lenses, shoot a lot of Infrared, and save quite a bit of time, and then pick and choose when I expose my 4x5 sheetfilm.
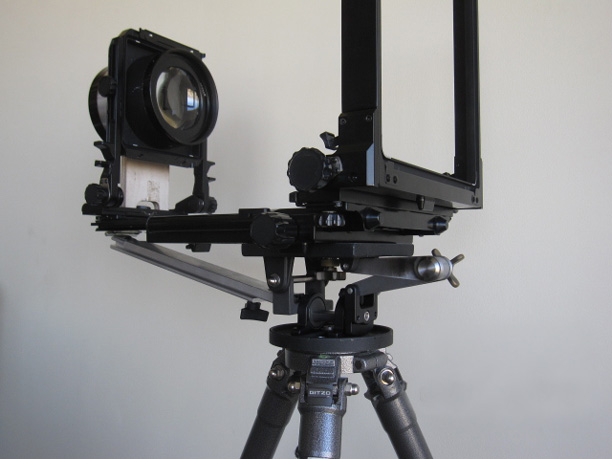
There’s one big problem w/using the Toyo 4x5 w/all this stuff hanging off the rear of the camera, and that happens to be that the Toyo’s original ¼-20 tripod hole which is located between the front and rear standards is now too far forward and an adaptor was needed to shift the ¼-20 placement back where the tripod mates with this new configuration to re-establish a working balance. Without this adaptor you have to ‘fight’ the camera wanting to fall backwards when you release the lock knob of the tripod head to try to frame/reframe.
The adaptor shown under the Toyo was a thick strip of aluminum which I bent in my vise to the config. shown, and has several threaded ¼-20 holes mating it to the original ¼-20 hole of the Toyo, the tripod, and at the rear to the 4” extension sleeve. This adaptor both shifts the balance backwards to where this config. is no longer backheavy but it gives some support to the extension sleeve so the heavy rollfilm adaptor isn’t pulling/stressing the top sliding lock at the back of the extension sleeve.
The camera is now a joy to use and the weight bet. front/back is now balanced. I don’t know why Toyo never provided an accessory like this.
Some of my lenses were intended for 4x5, a couple for 8x10, but in using rollfilm, and seeing what I'm seeing through the 6x9 reflex viewer it seems they’re all look much softer and will render much softer on rollfilm which is just fine w/me.
We’ll see.
Strut modification to my Toyo 810MII-Ries Head to support the weight of the 610mm AeroTessar
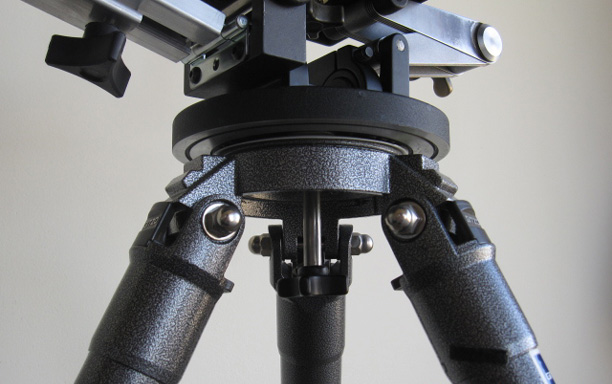
Starting from the bottom up: After purchasing my Ries head, Ries agreed to modify my Gitzo 1500 by machining a tightening screw coming from the bottom of the tripod up through to the Ries head. They did this mod ‘gratis’ and provided a delrin type spacer between the Gitzo and Ries head so you can loosen the tightening screw to pan the Ries head/camera combination very smoothly.
Initially I attempted to use a light stand as a second support in addition to my tripod to support the weight of my 600mm Aerotessar on the extension of my Toyo 810MII which resulted in my having to take the lens off the camera/dis-assemble everything to reframe, even if it was an adjustment of a 1/8 of an inch.. That wasn’t going to work.
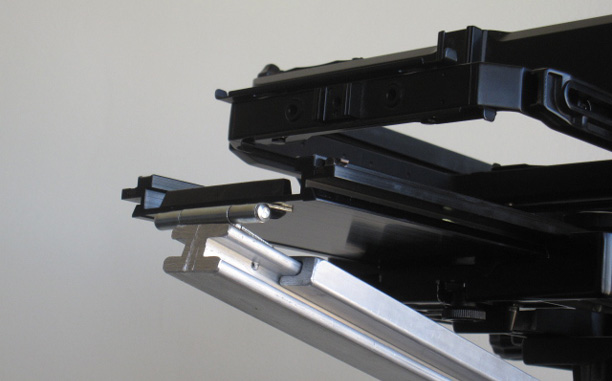
Considering the bed and extension of the Toyo 810MII as a ‘wing’, I decided a ‘strut’ was the answer to machining a support that would hold the AeroTessar while allowing me to pan/tilt the camera w/the AeroTessar aboard. I began ‘brainstorming’ a strut connecting the end of the Toyo extension bed to my Ries head. There were several considerations that made this harder than I initially thought it would be. The final iteration of the strut support modification shown here was my solution to the problems that came up.
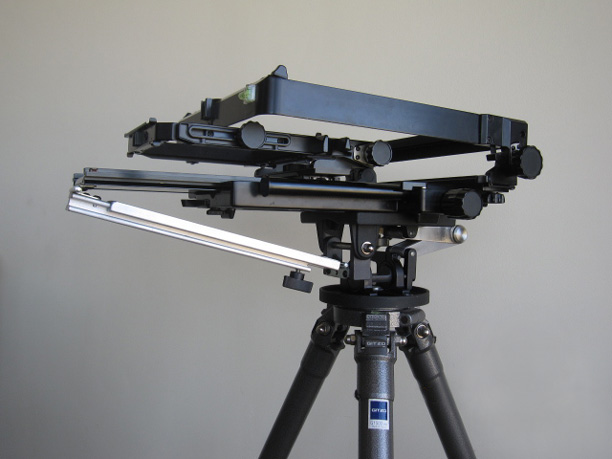
One pic shows the Toyo sans bellows, folded up, and the strut underneath connected from the cameras extension bed to the Ries head. The Ries head is now ‘dedicated’ to the Toyo by way of the strut support, and since everything’s lined up, and I only use the Ries w/my Toyo, there’s no reason to ever dis-assemble this comination and this is how I’ll use/store/transport this combination.
The exact length of the strut was based on an initial default position leaving the ext. bed extended about halfway out of the camera’s bed, this way I can shift the front standard w/shorter focal length lenses back and still use them at the default position, but also extend the extension to use the AeroTessar for CU work.
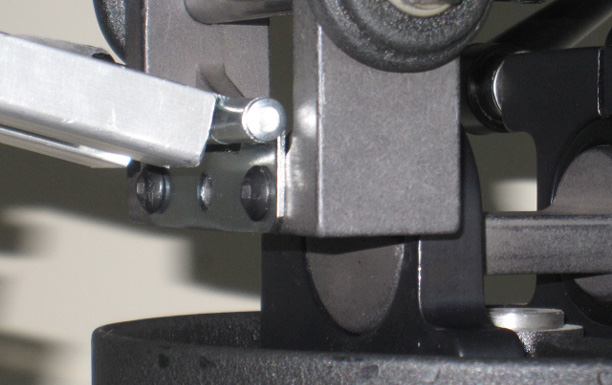
The strut consists of two extrusions, an ‘H’ shaped extrusion connected by a door hinge to the extension end of the camera, and a ‘closed in’ channel extrusion connected by a door hinge to the middle section of my Ries head. One side of the ‘H’ shape fits into the channel extrusion and telescopes in and out of the channel extrusion as you pull out the camera extension bed for additional bellows draw. There’s a fastening knob at the extreme end of the H extrusion which goes through that extrusion ‘butting’ up against the inside of the channel extrusion which is then tightened down at any set position. The strut had to be this way for this to work, as I’ll explain.
As shown by the pics, the bed of Toyo, the downward angle of the strut, and the vertical face of the Ries head where the struts is connected, in effect, form a right triangle, and pulling out the extension/lengthening the telescoping strut changes one side of that ‘triangle’ and so there’s a slight change in the opposing angles of the right triangle formed by the new position(because one side of the triangle has been lengthened).
This is why the strut had to end in door hinges at both ends, there’s a slight pivot at both ends which the door hinges take care of as the telescoping strut is lengthened or shortened. Trust me, without the door hinges, the telescoping strut DOESN’T WORK.
The Ries head consist of 3 sections, the top section which tilts up/down, and is connected to the middle section which pivots/tilts over left/right, and the strut is connected to this middle section so that the AeroTessar is supported by the strut as you reconfigure the position of the Ries head or loosen the tripod tightening screw to pan left/right. The AT has to be removed only when lengthening/shortening the strut.
Two shots show the AeroTessar onboard, and the strut supporting it’s weight(plus a piece of plywood supporting the lens in the front standard). The back of the AT has been blacked off.
The back lens element of the front group of the AT can be screwed in/out to mimic the front diffusion ring of the Velostigmat and that, and its F6 and 610mm focal length is why I went to all this trouble in the first place.
The aluminum extrusions are a very common profile if you decide to do something like this. This had to work or I wasn’t going to use the AT on my Toyo, Period.
I’ll began to shoot w/this outfit shortly.
I'm Back
There will be no pics for this entry, just words. I've been away from my sites Widopen and ImageandArtifact, and out of any serious photography for a while, and now I'm back.
2010 was a bad year for myself and those close to me. Someone close to me suffered a cerebral hemmorage, and I personally was involved in a very bad car crash. This stroke incurred a fortune in hospital and treatment costs.
The upside is that as bad as the symptoms of the stroke appeared to be at first(extensive paralysis), immediate and aggressive treatment returned all of her functions, and she’s now in physical therapy and a full recovery is expected w/her regaining full mobility, a miracle. My car accident completely destroyed my car, I was badly shaken but not seriously hurt.
In anticipation of something like this happening, I’ve paid a HEAVY health insurance premium for years in preparation for what has now happened to those in my inner circle, which completely paid off all medical costs, I’m thankful for that.
What’s happened has caused me to take stock of my life, to pause, and re-assess what I have and how lucky I still am. Besides selling a few lenses, I haven’t been involved in any deeply obsessed and prolonged photographic projects, and I’ve been on a de facto hiatus from Widopen, and Image and Artifact..
Lucky to not be deep in debt, I took stock of my possessions which don’t seem as important as they once did, and sold a couple of my most valuable lenses, deciding it was more important to do something for the kids w/the money while giving someone else a chance of stewardship w/this glass.
I appreciated some of the emails from folks from quite a afar asking me why I was selling these lenses, and why not keep shooting w/them. In answer, I had my shots, now someone else has their turn, and I have the money from these lenses which is goes towards my kids future. It did warm my heart that so many folks seemed glad that I was lucky to have a chance to work w/these lenses.
Things have settled down, life has gotten better, and I’m getting active in my projects again.
I'm in the process of photographing the results of a recently finished project to produce a support strut made out of aluminum extrusions which connect between the extension bed of my Toyo 810MII and the middle section of my Ries head in order to support the weight of the 610mm AeroTessar. This strut was machined in such a way so that I can pan the camera right and left, point it up and down, w/o having to remove the AeroTessar. Staytuned, the photos of this project coming soon.
I'll also upload the first viable image I've taken w/the front element of the rare Taylor-Hobson F1.5 projection lens which I'm using w/my Pacemaker camera.
I'm jumping into my photography again, but I've been reminded in a big way that life is precious.
Take care